This is the basis of Contemporary or Jazz Dance Terminology as I have always learned it.
Many schools and societies have different names for some of the steps, but most of them stem from the same steps that Martha Graham brought to the fore all those years ago.
It is one of those lists that I will be adding to constantly, as with modern dance there are always new things being added.
Contemporary/Jazz Dance Terminology
These terms cover the following dance forms:
Jazz / Contemporary / Modern
Arm Swings
Swings of the arms are pendular movements consisting of a downward and upward swing. The downward swing gives into gravity but the momentum gained as it falls causes it to swing up again. There is normally a moment of suspension at the end of the swing before gravity causes it to fall again.
While the arms are swinging, the legs normally give a bouncing action or a double bounce to create the rebound action.
Key components of this step are dropping the weight and releasing with grounded feet and safely aligned knees.
Swings can be initiated from different body parts like the pelvis, the knees, or the head. There is usually a feeling of weightiness in the head and the torso in the downswing. There is normally an exhale on the downswing and an inhale on the upswing.
Here is a simple exercise you can try:
It is important to keep the shoulder joint and arms relaxed to get that heavy look.
Imagery that can be used is a rollercoaster going down, gaining momentum, and rolling back up again. You can also think of space as a spring that compresses as you fall and that propels you back in the rebound. The body is continuously tracing arcs or curves through space.
Isolations
In Jazz, many different parts of the body can be isolated, for example, the rib cage, hips, shoulders, head, and chest.
The purpose of body isolations is to enable the separation of one part of the body from other parts and place it out of its natural position. Isolations are signature movements in jazz dance and they were used a lot by famous choreographers like Matt Mattox, Bob Fosse, Luigi, and Gus Giordano.
The knees are usually bent during isolations to enhance the movement.
When learning isolations, it is best to practice in front of a full-length mirror, so that you can ensure that the body is stable while you isolate sections. The skill of isolation lies in the ability to keep the rest of the body stationary.
Jazz Arm Positions
The purpose of using arms in Jazz Dancing is a vital part of the technique and assists with the style, coordination, and balance within the genre.
The arm positions strengthen the upper back (Trapezium and Rhomboids) as well as the biceps, triceps, deltoids, and Lattisimus Dorsi.
As a dancer, you need to ensure that there is no tension in the shoulders when showing any arm positions and that the core muscles are activated at all times.
In most of these positions, the fingers are widely splayed. Arms are often thrust into position. Thrusting usually refers to initiating through the shoulder, therefore unfolding from the shoulder into the arm position.
Here is a brief description of some arm positions:
(This may differ according to the syllabus that you are following)
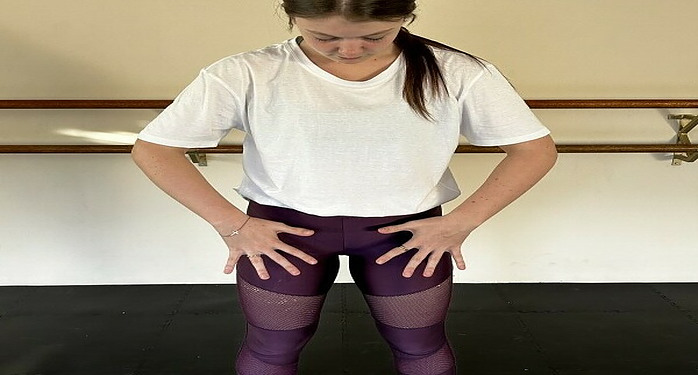
Preparatory:
Arms are bent at a 90-degree angle at the elbow with hands in front of the hips and elbows out to the side.
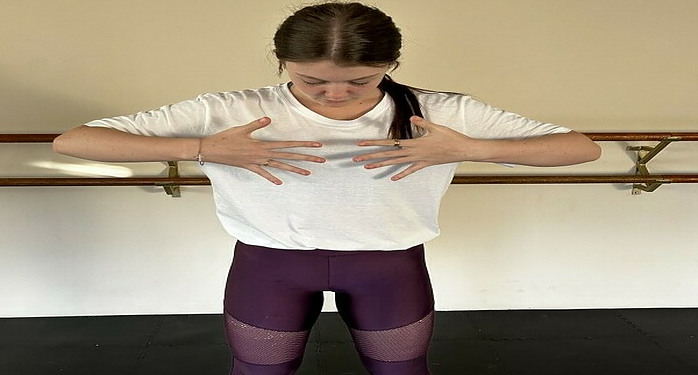
Short First Position:
Arms are bent sharply at the elbows with the hands in front of the chest.
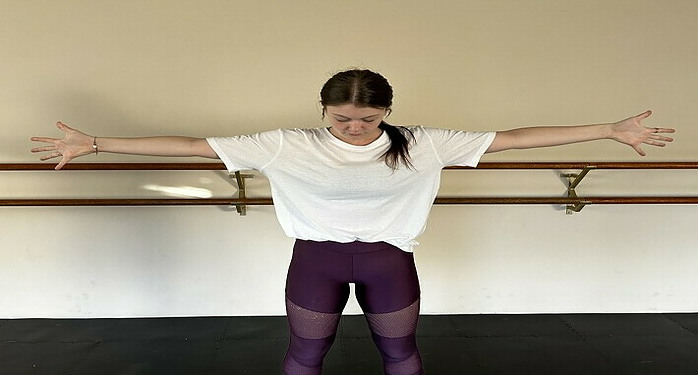
Second Position:
Arms reach out to the sides with elbows remaining slightly in front of the shoulders.
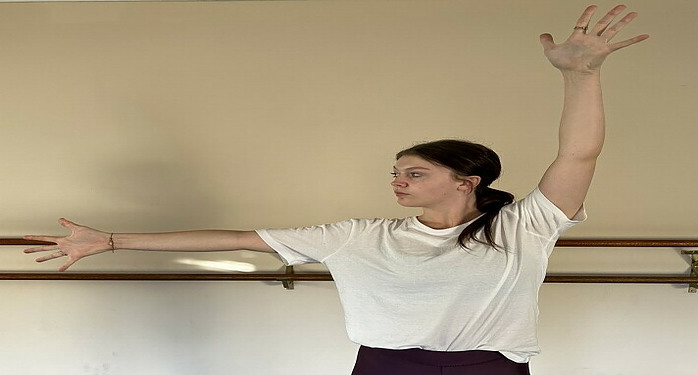
Third Position:
One arm reaches out to the side and the other is in 5th position.
 Fourth Position:
One arm is in first position and the other is in 5th position.
Fifth Position:
Both arms are in parallel position above the head with the palms facing forward.
Glisse
Battement glisse (French School), also known as battement degage (Italian School) or abatement.
Battement Degage is a classical ballet term meaning ‘disengaged battement.’
Usually used in the Cecchetti technique, a battement degage is very similar to a battement tendu but done at twice the speed, with the working foot rising about 4 inches off the floor.
Degage is a classical ballet term meaning ‘disengage.’ A degage is when a dancer moves their leg off the floor from a position with a pointed foot and straight leg to the front, side or back.
It gets its name degage because the step is a movement, not a position, where a leg ‘disengages’ from the other.
Relevé
Relevé is a classical ballet term meaning ‘raised.’ It describes the action when a dancer rises up and seemingly is standing on their toes in a demi-pointe or even fully en pointe.
To balance in a releve it requires concentration to maintain posture and alignment above the supporting leg.
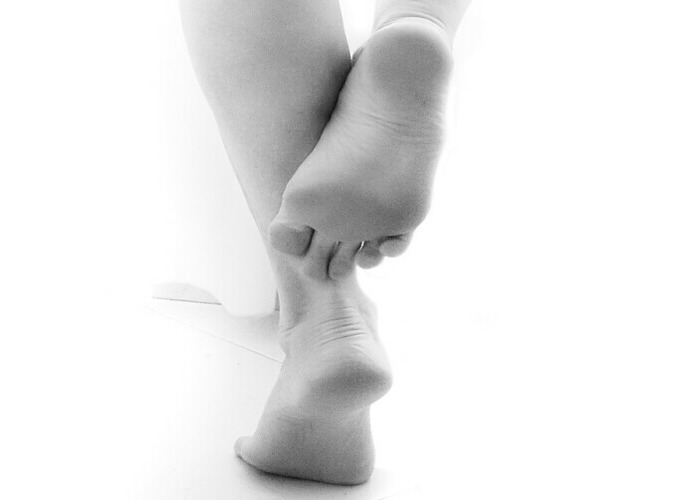 It takes lots of practice both at the barre and in the centre to get your balance and many things can go wrong while training this.
Some faults include:
Losing balance due to lack of focus on the center of gravity being between the feet.
Not using up onto the balls of the feet or no snatching action of the foot.
Poor posture and alignment (especially in the foot muscles).
Relaxed Jazz Lunge
The purpose of the Jazz Lunge is to stretch and enhance the strength, namely the Glutius Maximus, Sartorius, and adductors. It also strengthens the quadriceps, abdominals, and upper back.
To execute a Jazz Lunge, stand in a turned-out 1st position. Lunge to the side in a pile with the torso well held and the weight over the leg that is bent. Raise the heels slightly and place/rotate the feet parallel. the other leg is extended to the side and bent in a parallel placing, and both knees are bent. The leg to the side usually has a pointed foot.
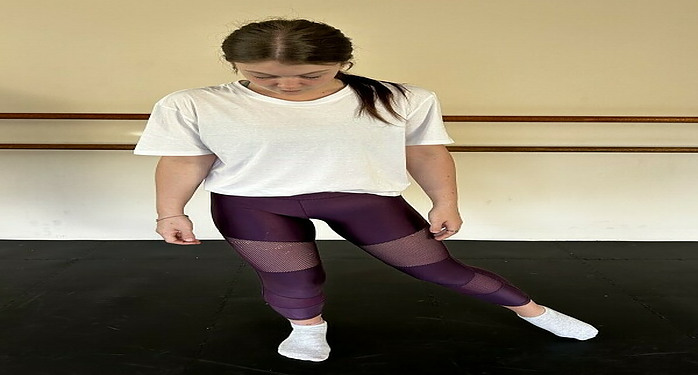
The Jazz Lunge has a feeling of placing a balloon between the knees and then without actually moving the feet, the balloon expands and the adductors resist this movement.
Deep Lunge
With an inhale, step your right foot forward, with the ball of the back foot on the floor. Step forward far enough so that your right knee can form a right angle.
Lengthen the torso forward. To soften your right groin, imagine that the thigh is sinking toward the floor under your torso’s weight.
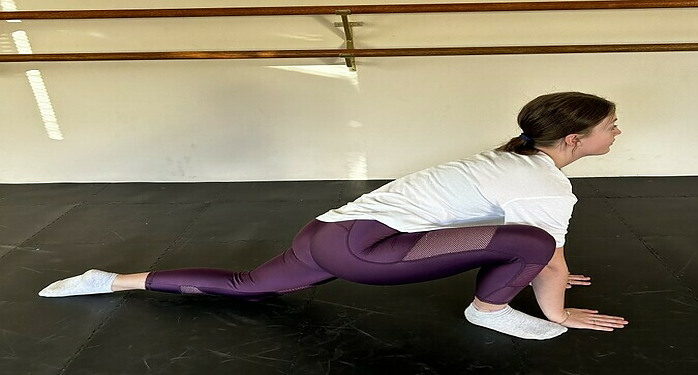
Look forward, simultaneously, contract the left thigh, and push it up towards the ceiling, holding the left knee straight. Stretch your left heel towards the floor.
The benefits of the deep lunge are that it stretches the groin and strengthens the legs and arms.
Side Lateral Stretches
The purpose of the side lateral is to provide stretch and strength in the lateral torso, lower spine, Quadratus Lumborum, and oblique abdominal muscles.
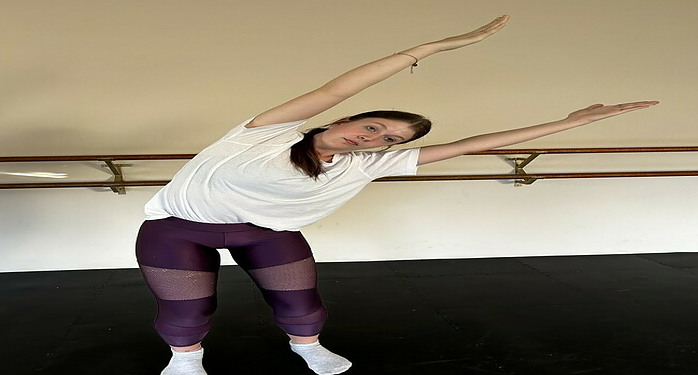
It also strengthens both the adductors and abductors.
Stand in a secure parallel small second position with correct alignment of the knees over the toes. To increase the range of movement, ‘shift’ the hip sideways and move the torso directly to the side as if the body is between two solid walls in front and behind.
Open the chest and make sure the top shoulder pulls back.
Once the range is at its maximum, aim for phips to remain held in place.
To release from the lateral stretch, relax the head and the torso and then recover to neutral.
Note:
The shift of the pelvis means that there is a sideways movement of the pelvic girdle and hip so that the hip goes off-center. This shift helps to create space for the body to move laterally and remain in one consistent line, keeping the shoulders in line with the hip bones. The idea is to free the space to add length and range to lateral side stretches.
Attitudes
This is a ballet step that is also used in modern. You can read an article about attitudes by clicking here.
Pas De Bouree
The jazz pas de bouree is a back-side-front three-step move in the floor pattern of an isosceles triangle.
The basic purpose of the pas de bouree is to transition from one move to another.
The pas de bouree takes its name from an 18th-century dance.
(A ball change is a syncopated weight shift onto the ball of the rear foot and back to the flat front foot).
The jazz pas de bourree is performed as follows:
- Start in a parallel position with feet together.
- Step behind with the right foot.
- Step to the side with the left foot.
- Step forward onto the right foot into fourth position.
- Arms usually move to third position in opposition.
- Step behind with the left foot.
- Step to the side with the right foot.
- Step forward onto the left foot into fourth position.
- Arms move to third position in opposition.
Watch for poor coordination of the feet and arms and not maintaining a low position as the step is completed.
Chainé Turns
These are consecutive half-turns traveling and rotating in a single direction on the balls of the feet and spotting as you take tiny steps.
The dancer should be focusing on one spot and whipping the head directly back to it after each rotation.
Read more about turns and chainé turns here.
Sitting On The Walk
The dancer sits on the floor with the right leg forward and the left leg back. Both legs should be in a completely perfect right angle.
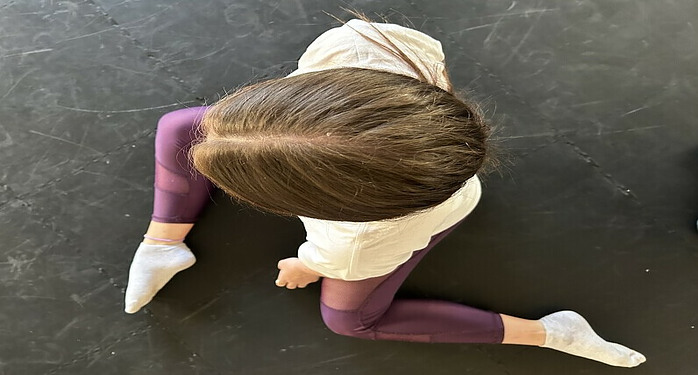
This will mean that the left sitting bone will not be able to reach the floor, as the hips will be held firmly in place. As soon as the left ischium touches the floor the pelvis is now spiraling and this is generally known as a coccyx spiral.
Aim for placement to be strictly correct in the angle placement. Knee in line with hip and foot in line with knee.
There are a few exceptions to the back leg being altered in the more advanced work.
It is important to grow in the spine and maintain a square shoulder placement. Lift well in front of the torso and aim to maintain the correct alignment of the rib cage. The ribs will often pull away due to a lack of strength in the abdominals.
Spirals
A spiral is a circling successive twist that wraps the torso into a strong suspension around the upright spine, like a rope in which the fibers are entwined.
There are several different spirals dancers can achieve, and you can read more about spirals here.
Unwind / Walk Over
The walkover is taken from the sitting on the walk (SOW) position mentioned above. If the SOW is well placed the walkover should be easy to do.
Using the hip spiral, the dancer moves to a seated position with both knees facing the ceiling and the feet flat. The torso is lengthened more to maintain the shoulder line directly over the hips and the arms usually lift towards 2nd position.
If the SOW is not correct, there will be no possible way of obtaining the above line when moving through.
The transition from sitting to unwinding to the opposite side should be smooth and continuous. The result of the unwind will have a perfect SOW to the other side.
Remember it is a transition movement and there should be no holding in the middle.
- Hold the abdominals firmly as well as the upper back.
- Maintain activation of the adductors.
- Avoid tension in the neck.
- Avoid tension in the arch of the foot.
- Avoid holding arms too far forward as you want the upper back to open.
- Avoid rolling back onto the coccyx.
- Lengthen the neck and raise the chin.
Back Contraction
When dealing with the upper back, we have three distinctly different movements:
- Back Contraction
- Upper Back Release
- Back Bend
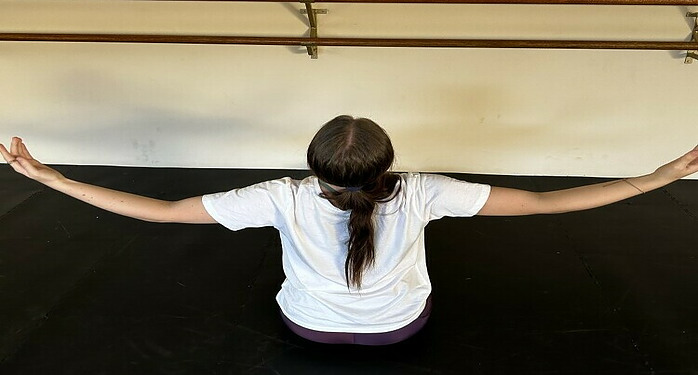
These movements all have a commonplace. The head never falls back as the neck is always held and lengthened. Take the hand and place it on the nape of the neck and while holding the hand in place, tilt the head backward. The hand being in this position will not allow the neck to collapse.
The hips remain in place and firmly held.
With a back contraction, the shoulders will remain in line with the hips while the upper back muscles contract and pull downwards as the chest lifts to the ceiling.
The movement is small to ensure the shoulders stay over the hips. The chest opens and the neck lengthens backward as the chin lifts and the eye line is raised to the ceiling. The focus is on the contraction of the upper back muscles.
Upper Back Release
The feel is as if you are trying to attach your belly button to your sternum. The lift comes from the mid torso lifting towards the chest and then arching over backwards by the imaginary vision of there being an eye on the chest and the eye is trying to look to the ceiling. the shoulder line will pull further back over the hips.
The focus is on the chest and the lift to the ceiling.
A good idea is to place your hand between the scapula and offer resistance as the dancer opens backward.
Back Bend
This is basically the same feel as the upper back release, but you will allow the dancer to use his/her full range of backend, as long as the hips remain firmly placed, and there is length in the spine and neck.
Some dancers will have a better range and this is all dependent on the individual spines.
Leg Swings
The leg swings improve the spiral range and open the chest, release tension in the hips, and are a good stretch for the glutes and lower back when held.
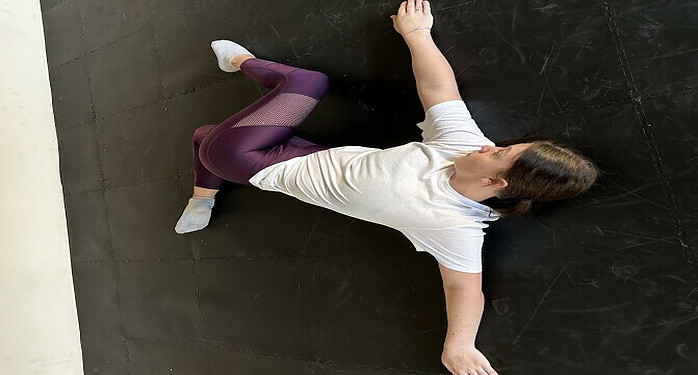
When starting to teach this, first place the dancer on her back and bring the leg over in opposition bent and try to achieve the correct position in the static placing first.
Use breathing to enhance. Once they understand this, the muscles involved have already achieved the crossed position, so all that is needed is to apply small pressure to the knee and then open the opposite arm and use the head.
Then start the transition from one side to the other without pointing the feet or ending the quad muscles.
It might be a good idea to start first leaning back on the hands in a sitting position, so the dancers can see what their legs are doing.
- Feet should never leave the floor
- Transitions should flow continuously
- Ankles and toes should remain relaxed.
- Never tense the Quads to use the leg
- Should be taken at a faster speed to limber in the hip socket.
Deep Quad Stretch
The deep quad stretch stretches the hip flexor, quads, tibialis anterior, hamstring of the front of the leg as well the the gluts. In turn, it also strengthens the upper back and the abs.
To do this stretch lie flat on your stomach. Bring one foot to the gluteals and hold the top of the foot to assess the degree of stretch in the quads. Hold this for a few seconds and repeat with the opposite leg.
Next place the dancer on a rubber or foam mat to protect the knees. Sit with one leg forward and the other behind the body. Carefully bring the back leg towards the body holding the top of the foot. Assess the range of motion and repeat with the other leg.
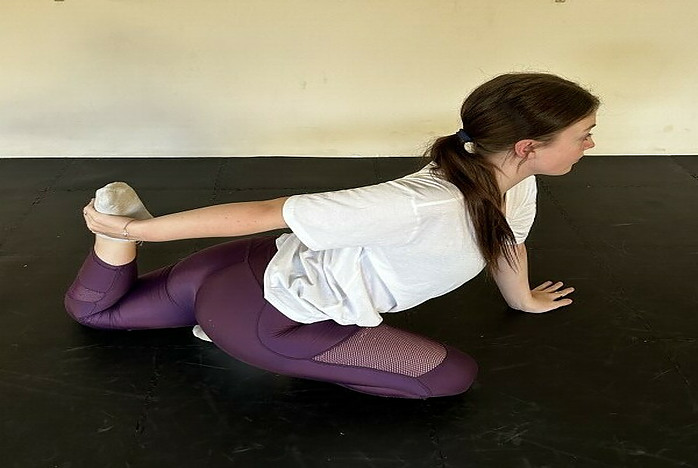 Now teach with the correct details of the body leaning forward on the elbow and sitting flat on the foot while grabbing the other foot from behind. It may take a while to achieve this and constant stretching of the hip flexors and quads is needed.
Pelvic Press/Tilt
Lie on the floor with your knees up and feet flat. Make sure you can slide your hand between your lower back and the floor.
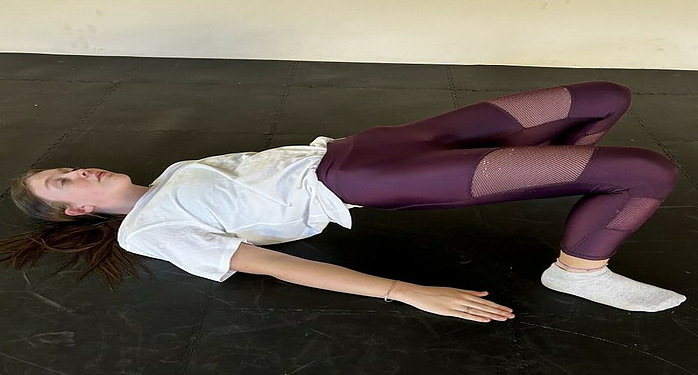
Inhale and initiate the pelvic tilt as you exhale. When you let your breath out, your abdomen should come toward your back. An effective pelvic tilt will utilize this leverage which is when the abdomen pulls in. Continue the pulling in, and allow that to tilt the bottom of your pelvis up. this will result in your lower back gently stretching and reaching or touching the floor.
Inhale to come back to start. Allow the spine and pelvis to return to their original position while you take air in again.
Note that movement in this phase takes less muscle work than the previous movement of bringing your lower back to the floor.
Be aware of how forcefully you do this movement. Try one or two pelvic tilts to get the feel of it.
If you are using a lot of muscle tension, try to ease up on that. You will likely still be able to complete the entire movement with reduced tension.
Check the tension in your hip joints. Because we want to work the abdominals in this exercise try to ease any tension you may notice at the muscles that cross over the hip hoints.
When performing the pelvic tilt, try to pull the pelvis from the abdominals, rather than pushing from the buttocks.
Jump From Dog
This starts in the dog position with the body looking like a capital A.
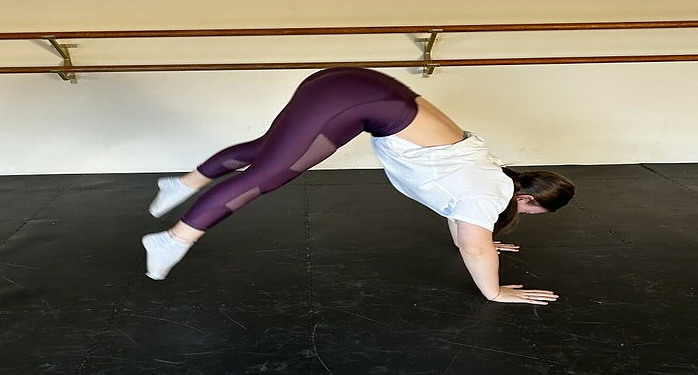 The theory that applies to a normal jump preparation is the same in this movement using a bend of the knees to initiate the action of the lift off the floor. As you bend, try to maintain the line of the coccyx.
- Maintain the line of the shoulders over the hands
- Maintain placing of the ears in line with the arms
- Avoid any opening of the rib cage or chest
- Feel the Coccyx lift to the ceiling and avoid any tucking or rounding of the lower spine.
- The feet should just aim to point and not try to kick out or backward.
- Focus in advance on the way you are going to recover to the next position.
- Hold the core for stability.
- Make sure that the dancer’s basic dog stretch position is secure and well-placed or this jump will not be executed correctly.
Graham Viatra
This is balanced and centered. In Horton, a similar line known as Pieta was taken from Michael Angelo’s ‘Jesus & Mary.”
The spiral of the legs towards the right of the body and the torso in opposition spiral to the left.
There is a strong contraction.
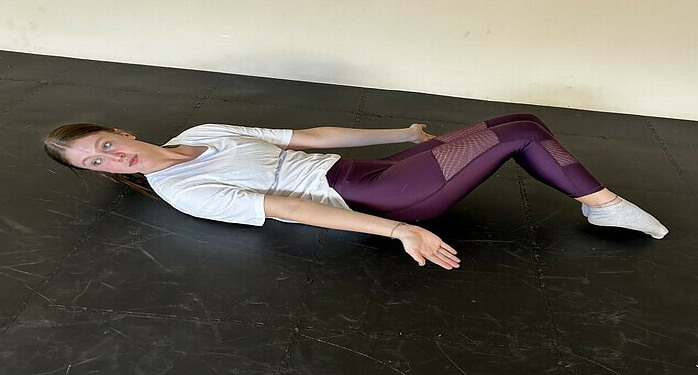
The head follows the line of the torso dropping diagonally back towards the floor.
Both arms are parallel and reach towards the feet with the distinct use of cupped hands.
The legs will bend slightly only as the feet must not shift or move.
A strong use of adductors is necessary to control the opposition pull.
The legs lengthen only through the counterbalance of the weight of the head.
Another name for this is ‘pleading.’
The oppositional pull is created by stretching in different directions while the energy radiates outward from the spine.
Layouts
In Contemporary or Jazz Dance Terminology this is a whole section on its own. You can read more about layouts by clicking here.
Hinges (Knee Drop)
The hinge’s roots date back to the 1930s when Lester Horton began to establish his approach to modern dance. He created six exercises or hinge studies focused on perfecting the step.
Before trying a full-out hinge, familiarize yourself with the proper alignment by practicing the move on your knees.
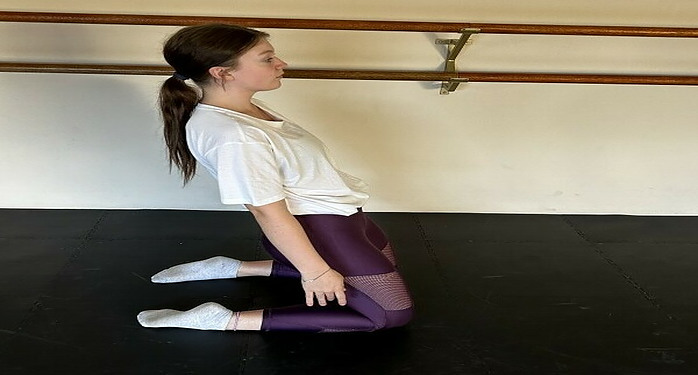
Start on your knees in an upright position with your toes tucked under and your arms by your sides. Feel your torso being lifted by your abdominal muscles and imagine your pelvis dropping through the floor while keeping the natural curve in your lower spine.
Maintain your alignment as you lean back as far as your quadriceps allow. The angle to which you can tilt depends on the length of your quadriceps. Don’t compromise alignment for a deeper hinge. Engage your abdominal muscles and glutes to return to the upright position, always keeping your torso straight.
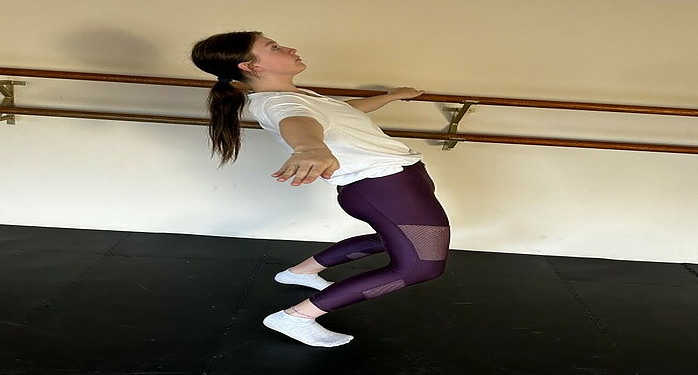 Be very aware of not arching your lower back.
After you are comfortable with a kneeling hinge you’re ready to try it from a standing position.
Begin in parallel with your feet hip-width apart and arms at your sides. Engage your abdominal muscles and elongate your neck so that your head pulls away from the end of your spine. Press your knees forward over your toes. Your body will lean back to compensate for the weight shift. Use your stomach and inner thigh muscles to hold your torso in a straight line.
Check your body position in a mirror.
Although you are descending, use your abs to lift your torso upward in opposition. Keep your head in the same position it was in while you were standing.
Practice at the barre to help maintain proper alignment.
As you approach the ground, continue to press your knees forward and lengthen your torso.
After you have decented, your knees might not touch the floor, depending on the length of your quadriceps. If so, lift your body slightly to accommodate the quads.
When performed correctly, the hinge is a dazzling feat of strength, but doing the hinge without proper technique can cause injuries.
Don’t arch your back. The plates a huge amount of stress on your lumber vertebrae which is a recipe for injury. To avoid arching, engage your abs throughout the entire hinge.
Don’t drop your abs or let your pelvis sink and make sure you are lengthening the torso.
Don’t initiate the hinge with a high rise on the balls of the feet. When done properly, your heels will lift lightly as you descend, but you can’t complete a full hinge properly if you begin in a high rise.
Steps Of Elevation
Mathematically, the human body (with two feet) is capable of only five basic jumps:
- Two feet to two feet
- One foot to the same foot
- One foot to the other foot
- Two feet to one foot
- One foot to two feet
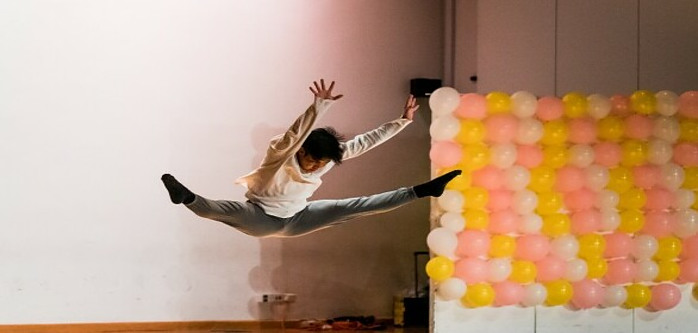
The purpose of jumps is to travel through space and to facilitate movement elevation and larger dynamic movements. Jumps and elevation are not only part of Contemporary or Jazz Dance Terminology, as most dance forms use these jumps.
The key element to consider when executing large jumps is connecting to the floor via a pile and harnessing the energy from the floor to launch the jump.
Also having a relaxed landing in contemporary dance, extreme athleticism has resulted in landings from a jump being on the hands or the sides of the lower leg and not the soles of the feet. To have a safe and relaxed landing, the body must exhale, releasing tension.
You can decide which works best for you, exhaling on the jump or the landing. awareness of your breath will improve your height and help release excess tension.
Vertical height is greatly increased when the feet roll sharply through to pointed toes beneath the pelvis.
Common mistakes when doing steps of elevation for contemporary or jazz dance include:
- Bringing tension into the shoulders, arms, and neck as you leave the ground
- Not breathing as you jump
- Timing of arms, legs, and breath uncoordinated
- Improper preparation before and during landing
- Not enough elevation
- Feet not fully extended or not working through the feet on the jumps
- Not covering enough space when traveling forward
Steps of elevation include grand jete, side split/straddle jump, Axel turning hop, sitting on the walk jump, etc.
Center Practice
In Contemporary or Jazz Dance Terminology center practice is to take away from the barre and balance. To use control, balance, and core connection.
The strong use of the feet through the floor with resistance.
We try and avoid positions in center practice and rather use fluid transitions.
Co-ordination
The art of taking isolations, and contractions and combining them with fast footwork at a brisk tempo.
Spatial
For contemporary or Jazz Dance Terminology spatial is a center movement where the hips and shoulders will show direction as set.
Spatial is all about the use of floor space with breadth, depth, and attack. A spatial is normally a dance exercise that travels.
Floorwork
The purpose of floor work comes from Martha Graham’s technique.
The technique starts with a 40-minute floor warm-up, incorporating contractions and spirals.
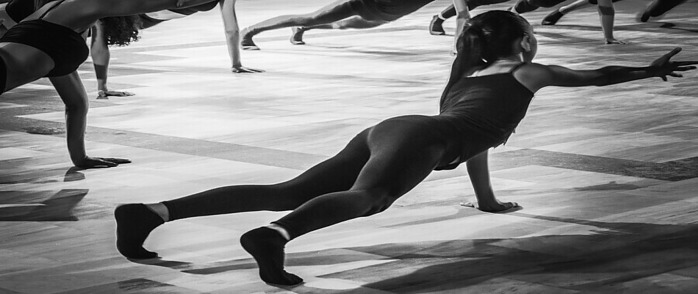
The idea is based on the fact that we can focus on the movement if we are not preoccupied with balancing. With both sitting bones on the floor, the dancer can give 199 percent accuracy to the technique.
Trench
This is the riding and sliding on the support leg for as long as possible.
This Contemporary / Jazz Dance Terminology list is probably going to evolve and grow over time.
